Products
Solutions
Resources
9977 N 90th Street, Suite 250 Scottsdale, AZ 85258 | 1-800-637-7496
© 2024 InEight, Inc. All Rights Reserved | Privacy Statement | Terms of Service | Cookie Policy | Do not sell/share my information

When you need to add multiple cost items to your project, adding them manually can be tedious and time consuming. To save time, if you can export your cost items to Microsoft Excel (e.g., export to Excel from your estimating software), you can import them into Control, allowing you to update your estimate in bulk, without needing to manually enter data into individual cells.
Click the Import icon on the right toolbar of the Control > Workspaces page to go access the Excel import feature.

The table below indicates the data you can import into Control from Excel.
|
Data Type |
CBS Columns |
|---|---|
|
Tasks |
CBS position, Description, UoM, code-related fields, user-defined fields, other settings found in the Task details data block in Control. |
|
Schedule |
Schedule ID, schedule dates, Scheduled, Schedule plug days, Plug days, Cost curve, Roll up schedule |
|
Current Estimate |
CE final MHrs, final costs, total equipment hours, MHr/Unit, units/MHr, equipment hour/unit, labor cost/MHr, equipment cost/MHr, Secondary Qty, Scales 1, 2, and 3. |
|
Cost Categories |
Total and unit costs. |
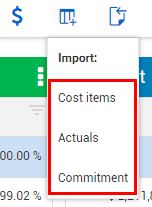
When you click on the Import icon on the CBS tab of the Workspaces page, you have three import type options. You can import cost items, actuals, or a schedule.
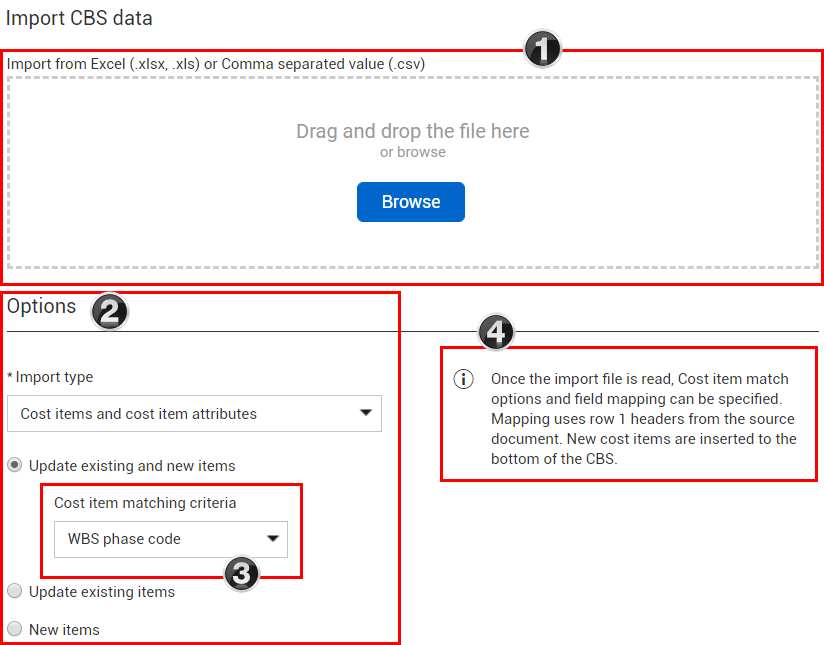
After you make a selection, the Import CBS data window opens.
|
Title |
Description |
|
|---|---|---|
|
1 |
Import from Excel |
You can either drag and drop or browse to the file to import. Microsoft Excel files (.xlsx,, .xls) and Comma Separated Value (.csv) files can be imported. |
|
2 |
Options |
You can add new cost items and update cost items that already exist in the project, choose to only update existing cost items, or only add new. |
|
3 |
Cost item matching criteria |
When adding and updating cost items, the structure in the spreadsheet you are importing from may be in a different order than the structure in Control. By specifying a code for matching your cost items, the import routine will know which cost items in the spreadsheet are new when adding new items, and which cost items to update with data from the spreadsheet when updating cost items. |
|
4 |
Information message |
This information provides a description of available functionality and instructions for proceeding to the next step. |
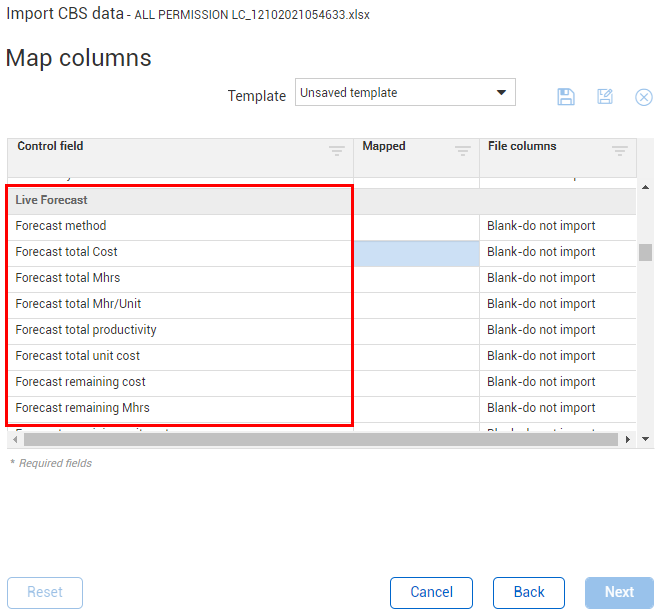
Clicking Next opens the Map columns dialog box, where you can map your Excel columns to the appropriate column in Control.
|
Title |
Description |
|
|---|---|---|
|
1 |
Template |
After you map the import file columns to the CBS columns in Control, you can save your settings as a template for future use. This is helpful when you need to make scope changes or updates on a regular basis. |
|
2 |
Control field |
The names of the column headers in Control that you can map your data to. |
|
3 |
Mapped |
A green checkmark indicates the column in your import file is mapped correctly to the CBS column. The Green key indicates the matching code you specified is locked. |
|
4 |
File columns |
The names of the column headers in your import file that you can map to the CBS columns in Control. |

When manually importing cost items by either updating existing cost items or importing new cost items, you can also import forecast values via Excel. How the fields are mapped in Excel determines which CBS forecast columns are populated.
Examples of some forecast columns that can be mapped via the Excel CBS import cost item process include, Forecast total cost, Forecast total MHrs, and Forecast total unit cost. Cost categories can also be selected for importing into Control.
For the import process to work correctly, the items in your Excel spreadsheet must be formatted in a certain way so that Control can recognize the items. The following table indicates important spreadsheet rules to follow to make sure your data imports successfully.
|
Attribute |
Rules |
|---|---|
|
Import function |
Reads the first worksheet within the referenced workbook. |
|
First row of data |
Considered to be the header row of the data. This imports as titles which are referenced during the mapping process. The import stops reading headers if it encounters a blank header cell. |
|
Numbers |
Needs to be the actual number, and not the summation of cells. Values cannot contain the $ symbol or other currency symbols. |
|
Second row of data |
Considered the first row of data to be imported. |
If you make changes in the spreadsheet, you must save the spreadsheet before importing (only saved data will be imported).
Below is a list of items to be aware of during the population of the import template.
The Excel file should not be open while simultaneously using the import wizard.
If there are any edits made to the spreadsheet, it must be saved and closed prior to importing.
CBS positions cannot be duplicates. They must be unique to each cost item.
The system will show an error if there are any duplicates.
The WBS phase codes are not required during the import but must also be unique per cost item.
Cost categories are spelling and case sensitive, and must match directly to the cost categories spelling.
The cost categories list can be exported from the import wizard.
The Excel sheet cannot contain any blank cells during the import. Blank cells show an error and cause the import to stall.
Make sure any blank columns from an export file are removed before importing again.
Date formats must match spreadsheet date formats. The Import Wizard will prompt you to chose a date format used in the spreadsheet.
The Import wizard will prompt you to chose adate format prior to initiating the import.
Use WBS phase code as the matching criteria for updating existing items.
WBS phase code are tied 1:1 for each cost item. The CBS position can be changed, but the WBS phase code remains the same regardless of CBS position.
Set up the views for exporting of data to match the import template created. Views are customizable for flexibility in what is being imported/exported.
Import template mapping is unique to each individual user. Master mapping cannot be set at a global level. It is recommended to provide users with a step-by-step import mapping document to set up data mapping initially during the on-boarding of InEight.
When exporting data in Control, current system drops trailing zeros on CBS positions. Example: 1.10 exports as 1.1.
One way to get around this is opening data as a CSV file in Excel.
Once you have downloaded the export file, proceed to the following steps.
Open blank Excel sheet
Navigate to Data tab
Click Get Data > From File > From Text/CSV
Choose downloaded export file
Click Import
Click Load
Your data will now be imported into the sheet where updates are made. Once you have completed your updates, you may save and re-import the same file.
If you select CBS position as the matching criteria for the import, the import routine recognizes the hierarchy of your structure by the numbering of the codes.
After the import is complete, if the CBS position for the new cost items match existing cost items in the CBS, your new CBS cost items will import as you have defined them. The existing CBS cost items will shift down and be relabeled to match the next corresponding number.
When adding new cost items to an existing CBS position, a warning message displays informing you the CBS positions you have picked already exist. The message then asks you to confirm if you would like to continue with this import.
New cost items created via the import process automatically adjust the CBS structure hierarchy to match your import as needed and predict the movements in the current hierarchy, and the hierarchy that is being added via the Excel import.
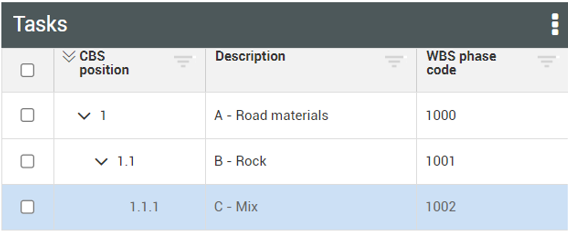
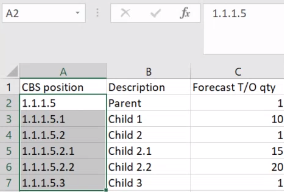
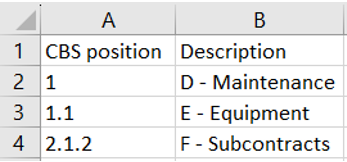
For example, you have three cost items that you want to import, as shown below. Positions 1 and 1.1 already exist in the CBS, and position 2.1.2 is new.
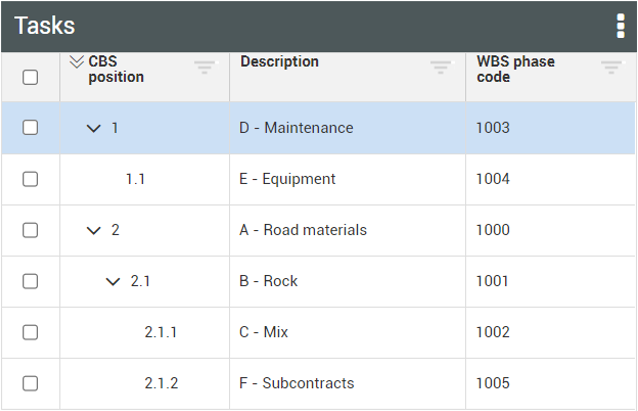
The import process imports Excel CBS positions 1 and 1.1, and places 2.1.2 at the bottom of the hierarchy.
The following steps walk you through the import process.
The following steps are only applicable when importing new cost items. 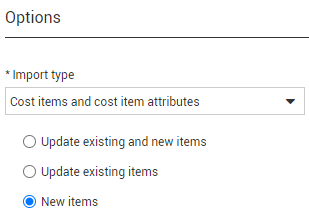
From the Control > Workspaces page, on the CBS tab, click on the Import icon on the right toolbar.
Select Cost Items when the Import CBS data window appears.
Click on the Browse button to select a file to import.
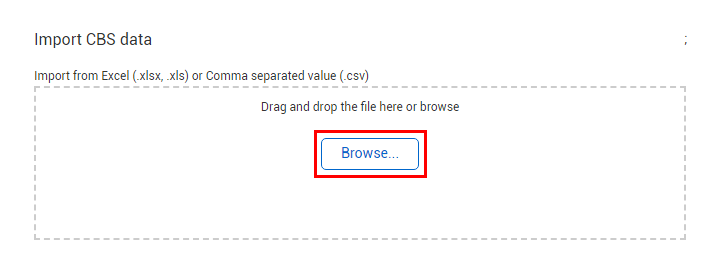
Browse to the Excel file you wish to import.
The file and its location should be indicated by your instructor if you’re in a classroom setting, otherwise you can select one of your own
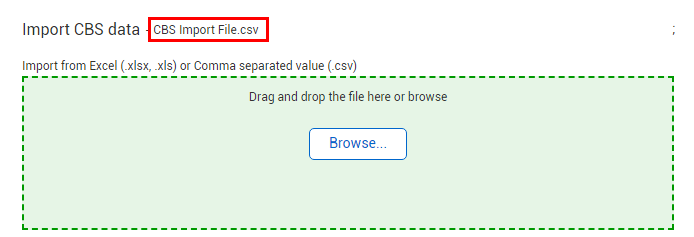
Select the import file and click Open.

The import file is now selected
Under Options, select New Items (if not already selected).
For the Cost item matching criteria, select Cost items and cost item attributes from the drop-down list.
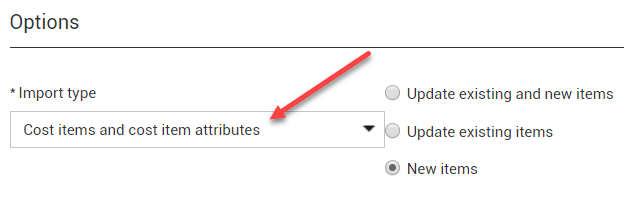
Click Next.
This takes you to the Map columns window
Note that the File columns fields are set to Blank-do not import by default
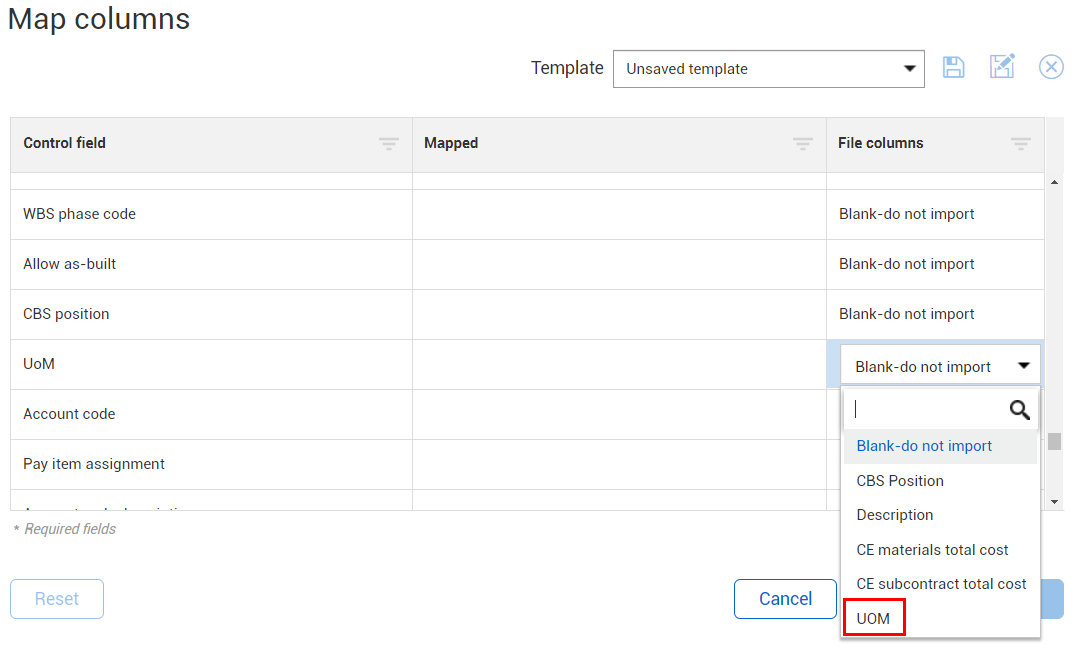
Select UOM from the drop-down list to map the UOM column in the Excel file to the UoM CBS column.
Repeat the selection process to select the appropriate File columns to map to the following CBS columns:
CBS position
Description
WBS Phase Code
Forecast (T/O) quantity
CE Final MHrs
CE final cost
A green check mark indicates successful mapping of your file columns

To save these settings for future use, click in the Template field and type Steel Structure Template.

Click the Save icon to save the template.

Click Next.
A progress bar appears informing you the import is in progress

A prompt appears, indicating the project will be disabled from use during the importing process

Click Import now.
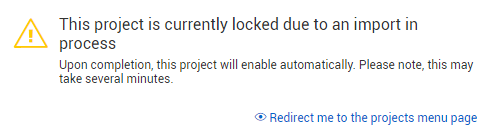
A prompt appears informing you that the project is currently locked for the importing process
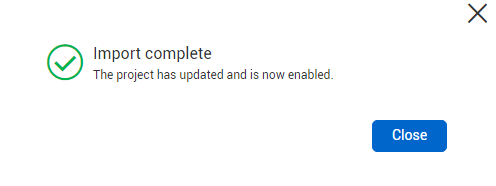
Once completed, you will receive the following prompt, informing you the data imported successfully
When conducting the import, you may run into errors. This will be indicated when you attend to run the import routine by the following prompt:

The prompt window includes a Review errors and items for import link, which you can click on to resolve any issues prior to final import. An error resolution page opens where you can identify and resolve your errors.

There can be situations where the cost item Excel import process will successfully process some cost items, but fail to import other cost items. In this situation the process will show as failed. For example, you imported 100 cost items, and 90 of the cost items import successfully. There are 10 cost items that did not import successfully. In this scenario you would need to resolve the import errors.
Importing committed cost mainly helps to keep track of subcontract cost items where you would have a purchase order that would drive all of your cost.
You can import two types of committed cost:
Open/Remaining Committed Cost
Open/Remaining Committed Cost is the cost you still have left to pay on the purchase order. Total committed cost is the total purchase order amount for the purchase order.
Committed cost were previously located in different areas of Control. You can have Open and Total committed cost columns in your CBS. The same columns are also in the Commitments tab of the Actual Details Slideout where you can make manual edits to the committed costs. Columns in CBS for Open and Total committed costs only reflects the manual edits you made in the Actual Details Slideout. Open and Total committed costs are also shown in cost item details slideout cost categories tab.
You can import committed costs using the import icon on the CBS and selecting Commitment.

To bring in committed cost from the excel import, you first need an existing value in your CBS that matches the Excel Spreadsheet value. This can be one of two options:
You will also need the Type of committed cost you want to import, either Open/Remaining Committed Cost or Total commitment.

Open/Remaining Committed Cost and Total commitment types need to be spelled exactly word for word as it is written in the screenshot. If you shorten any of the wording in the Type column, the system will not accept the import and you will receive an error.
Each Type of committed cost has to be its own line item on the Excel spreadsheet. You can do multiple transactions for one cost item, but only one commitment type per line item. if they are different types, you need to separate them out into different line items.
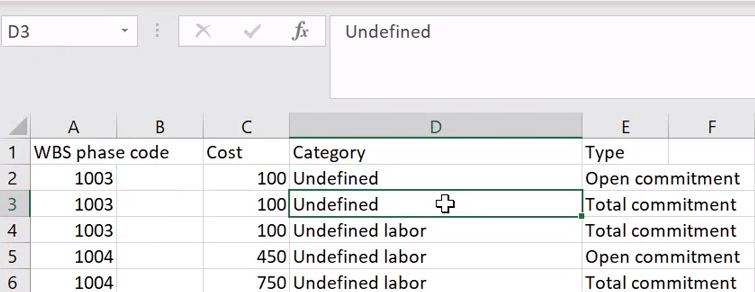
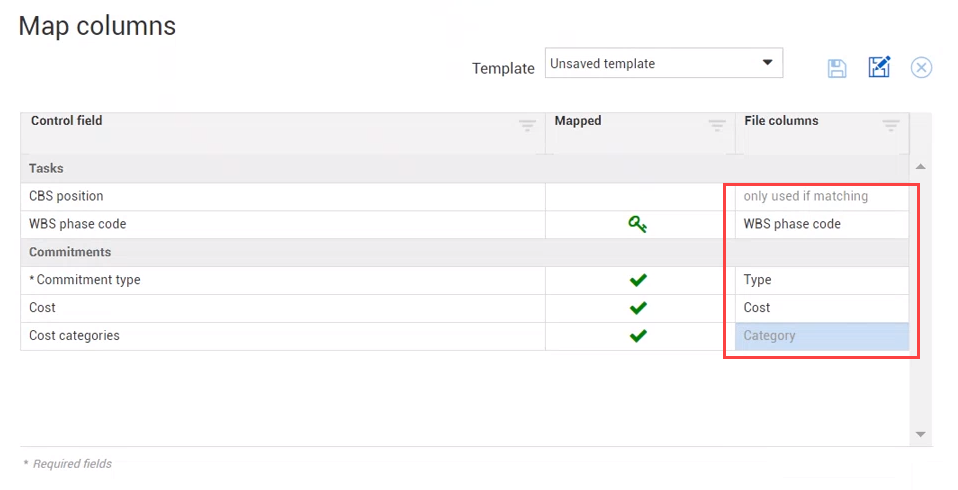
Each column needs to be created and defined if you are to do a Commitment Excel Import. You must include a Cost column and a Category column as shown in the above image.
Open/Remaining Committed Cost should never be greater than your total. Open/Remaining Committed Cost cost should either be equal or less than the Total commitment cost.
Follow the step by step to Import commitment data.
From Control's CBS tab, select the import icon. Then select Commitment.
After you have created your Excel spreadsheet with your commitment costs, select Browse from the Import from Excel window. Then select the Excel file name you saved.
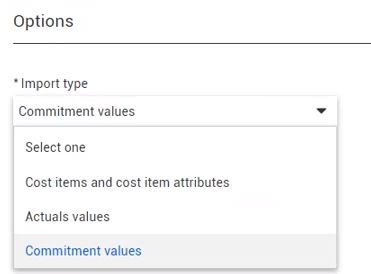
After you return to the Import commitment data window, under the Options section, select the Import type drop down arrow. If it is not already selected, select the Commitment values option.
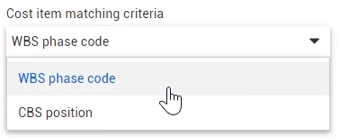
Select the Cost item matching criteria drop down and choose either WBS phase code or CBS position.
After selecting the drop down options, select Next in the bottom right corner.
From the Map columns screen, select the columns you are importing from your Excel spreadsheet.
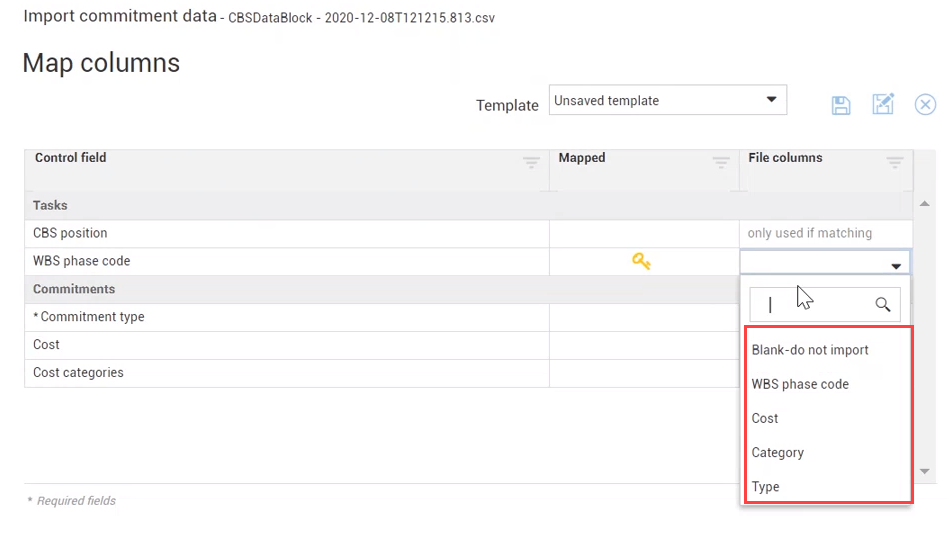
The Control field should match the File columns. For example, Commitment type in Control field should match Type in File columns as shown below. Once done, select Next.
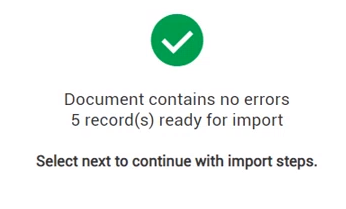
If there are no errors in the mapping stage, you should see a green check mark on the next screen, indicating everything is ready to be imported.
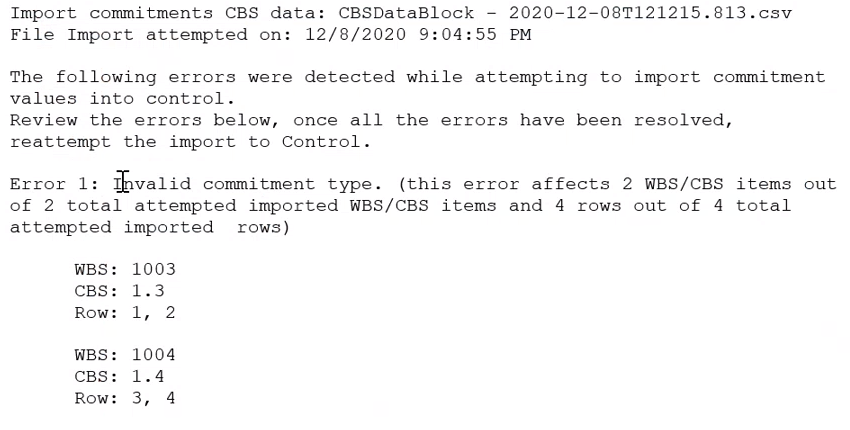
If you receive any errors in the mapping stage, you will receive an error with a download option to download a word document that shows you all the errors.
Click Next and then select Import now. This will create a line item in the Import history section of the Audit Log tab.
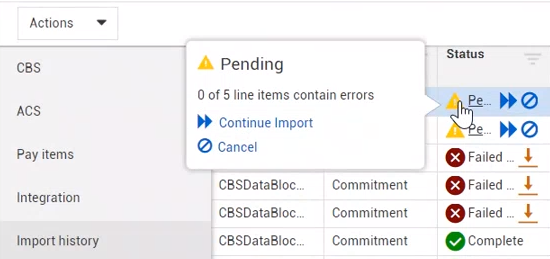
From Control, go to the Audit Log tab. Then select Import history. Hover over the yellow triangle to view the information on the pending import item.
After the pending import is Complete, the committed costs populate in the Cost Categories Details tab, as well as the CBS. It the costs also appear in the Commitments tab from the Actuals Details Slideout and populates into the new Open and Total cost committed columns.
If the imported commitment costs fail to import, the Aduit Log Import history would show that the import failed completely.
Additional Information
9977 N 90th Street, Suite 250 Scottsdale, AZ 85258 | 1-800-637-7496
© 2024 InEight, Inc. All Rights Reserved | Privacy Statement | Terms of Service | Cookie Policy | Do not sell/share my information